
Table of Contents
ToggleSunspot has solidified itself as one of Fortnite’s most contested and strategically rewarding locations, especially in Chapter 6. Whether a player is hunting for early-game weapons, rotating through high-action zones, or positioning for late-game dominance, understanding Sunspot’s layout, loot distribution, and unique mechanics can be the difference between a Victory Royale and an early elimination. This guide breaks down everything needed to master this POI, from optimal landing zones to loadout recommendations and environmental hazards. Players at all skill levels will find actionable strategies here, casual drops looking for quick fights or competitive squads preparing for endgame scenarios.
Key Takeaways
- Sunspot Fortnite is a mid-sized POI in the southwestern map quadrant that balances solid loot and action without drawing the entire lobby, making it ideal for both casual and competitive players.
- Landing at the Central Farm Structure offers the highest loot density with 2-3 guaranteed chests, while the Northern Residential Area provides a lower-traffic alternative for teams avoiding early contests.
- Sunspot’s open terrain makes storm rotations a critical hazard—always establish rotation paths before zone 2 appears rather than waiting for the storm to force reactive movement.
- Priority loadout strategy for Sunspot early-game combat favors close-range weapons like Combat Shotguns and SMGs for tight farm corridors, with Assault Rifles as secondary options for medium-range encounters.
- Common mistakes like looting in exposed areas, ignoring vehicle audio broadcasts, and overspreading squads across the POI lead to preventable eliminations—maintain cover awareness and squad cohesion throughout.
- Success at Sunspot depends on timing and adaptation: land with purpose, loot with cover, rotate proactively, and adjust weapons based on opponent encounters rather than committing rigidly to initial loadout plans.
What Is Sunspot in Fortnite?
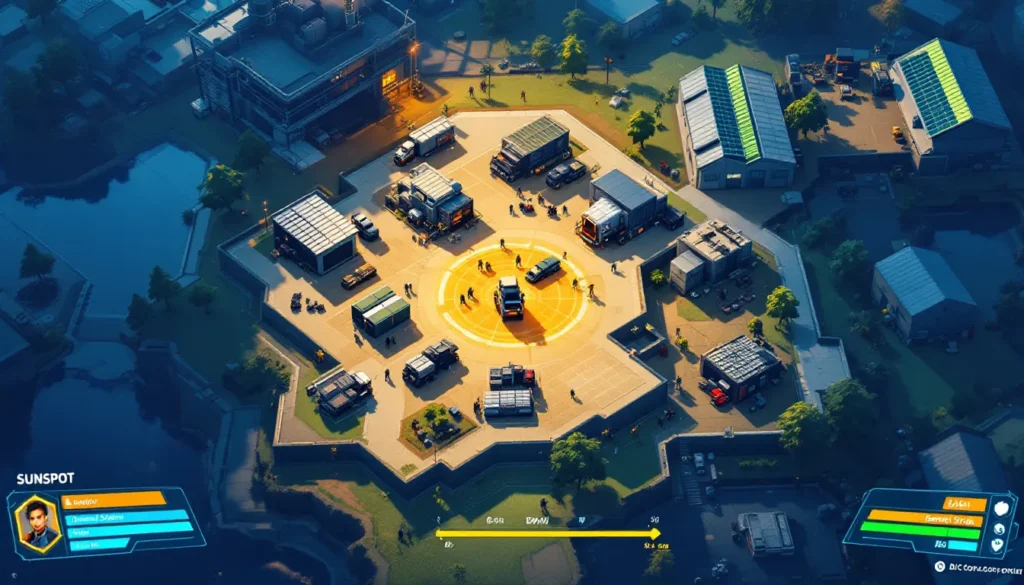
Sunspot is a mid-sized Fortnite POI that combines industrial infrastructure with open combat space. The location features a central solar farm aesthetic with metallic structures, loot-rich buildings, and vehicles scattered throughout. It’s positioned as a medium-rotation drop that doesn’t draw the entire lobby like Tilted Towers or Pleasant Park, but offers enough loot and action to justify landing there.
The POI gained major traction post-Chapter 6 as a rotating hot drop during competitive seasons. Players appreciate Sunspot for its balanced risk-reward profile: solid loot without being a guaranteed third-party hotspot early game. The layout encourages both aggressive early fights and strategic mid-game rotations, making it flexible for different playstyles. Veterans of the map know Sunspot as a farm that doesn’t completely bleed out players by zone 2, unlike some notorious hot drops.
Unlike Mega City or Rave Cave, Sunspot doesn’t feature unique collectibles or seasonal storyline progression, so it remains relatively stable patch-to-patch. This stability makes it ideal for building consistent drop habits and grinding rank points in ranked modes.
Location and Map Position
Sunspot sits in the southwestern quadrant of the Fortnite map, positioned between Pleasant Park and Retail Row. This placement makes it accessible from the battle bus regardless of path and offers natural rotations toward multiple endgame zones. The grid location is approximately H4-H5, making callouts in squad comms straightforward.
The surrounding area features open fields and minimal nearby POIs, which means rotations require either vehicles or prepared rotation paths. Players landing at Sunspot won’t spawn directly into competition from neighboring drops, though storm positioning matters significantly. If zone 2 pushes toward the eastern side, Sunspot becomes a prime rotation point for squads needing to move inland.
How to Land and Navigate Sunspot
Landing at Sunspot requires precision to maximize loot efficiency. The optimal landing zone depends on squad composition and rotation needs. For aggressive early-game teams, landing on the central structure where the solar panels dominate guarantees immediate weapon access and reduces dead-time looting.
Key landing points:
- Central Farm Structure: Highest density of ground loot and chests. Priority for teams expecting early fights.
- Eastern Warehouse: Secondary loot with vehicle spawns. Better for squads planning mid-game rotations.
- Northern Residential Area: Lower traffic. Ideal for low-profile drops when Sunspot isn’t contested.
Once landed, movement matters. The POI layout flows north-to-south with vertical terrain advantages along the western edge. Teams should establish control of higher ground immediately, as sight lines from the warehouse overlook most of the farm. Navigation becomes critical during rotations: the open space between structures leaves little cover, so players should pre-plan routes before storm pushes force movement.
Loot Distribution and Item Spawns
Sunspot’s loot economy is solid but not exceptional compared to vault locations. Expect approximately 15-20 ground spawns and 4-6 chests depending on whether spawners activate that match. Rarity distribution skews toward common and uncommon, though chest locations occasionally yield rares and epics.
Loot spawn locations are intentionally spread across the POI to prevent one squad from monopolizing everything. This design choice means teams need to split resources or accept incomplete loadouts early. The loot refresh time is standard (5 minutes), so rotations back through Sunspot during mid-game rarely yield valuable second harvests unless nobody else landed there.
High-Value Loot Areas
Not all loot at Sunspot carries equal weight. Competitive players prioritize locations with guaranteed chests or consistent rare spawns:
Central Solar Farm: Contains 2-3 chests always. This zone is the hottest early-game real estate. Teams should anticipate contested landing if opponents also commit to this area. The farm structure offers multiple entry points, reducing predictability for defenders.
Eastern Warehouse: Features 1-2 chests plus 3-4 floor spawns concentrated in the storage rooms. Less contested than the farm, making it safer for late-landing squads. Vehicle spawns here also provide rotation tools.
Northern Residential Building: Typically has 1 chest and scattered floor loot. Lowest traffic during first minutes, making it valuable for teams avoiding immediate engagement. The isolated position means minimal third-party risk during looting.
Weapon and Supply Spawns
Weapon distribution at Sunspot follows Fortnite’s standard system. Expect a mix of AR (Assault Rifles), SMGs, shotguns, and sniper spawns throughout the POI. Supply drops sometimes land at Sunspot, though they’re not guaranteed. Rotation-focused teams shouldn’t plan loadouts assuming supply drop arrival.
Typical weapon progression for Sunspot drops:
- First 30 seconds: Ground spawns (ARs, SMGs, healing items)
- Chest opening phase: Chance for rares, upgraded weapons, or specialty items
- Secondary loot rotation (post-initial fight): Floor loot replenishes in uncontested structures
Shield potions and healing items appear frequently, making Sunspot a reliable spot for sustain. This abundance means teams can afford to fight early and heal through damage without fretting over potion scarcity. Ammo spawns align with weapon concentrations: heavy ammo less common, light and medium ammo plentiful.
Strategic Gameplay Tips for Sunspot
Success at Sunspot hinges on timing, positioning, and adaptation. Different game phases demand different strategies. A drop that works for early aggression fails if zone pushes toward the ocean. Similarly, positioning for endgame at Sunspot requires reading rotations opponents haven’t predicted yet.
Early Game Strategies
The first 90 seconds at Sunspot determine whether a team leaves with weapons and armor or dies looting. Aggression works, but only if planned.
Drop timing: Land with 4-5 other squads if seeking fights. Fewer than 3 squads means likely victory but minimal experience. Mentally prepare for contested looting: move fast, grab any weapon, and isolate targets.
Weapon priority: Grab a weapon (any rarity) before moving to chests. An uncommon AR beats an unopened chest. Prioritize quick-equip weapons like shotguns and SMGs over slow-firing sniper rifles in cramped structures.
Rotation setup: While looting, identify the nearest vehicle or natural cover path toward zone 2. Don’t commit fully to the farm structure if zone trends away. Be ready to pivot.
Fighting philosophy: First fight win sets momentum. But, if multiple teams converge, third-partying is inevitable. Either eliminate squads decisively and heal immediately, or dip out of the POI after one kill. Staying at Sunspot past the five-minute mark during crowded games guarantees storm stress.
Mid-Game Rotations
Once Sunspot clears (storm forces exodus), it becomes a rotation hub rather than battleground. Mid-game decisions at Sunspot involve resource conservation and positioning.
Resource audit: Check shield, ammo, and healing before leaving. If running low, spend an extra minute looting secondary structures. A missing shield potion costs gunfights downfield.
Rotation timing: Leave Sunspot when zone 2 appears on the map, not after. Leaving early grants control of rotate destination. Late rotations force sprint, taking storm damage, and landing reactive rather than proactive.
Vehicle usage: The vehicles at Sunspot (mostly ATVs and trucks) save 20-30 seconds of travel time toward zone 2. Use them unless enemy teams are actively rotating near your path. Audio cues from engines travel far, so balance speed against stealth.
Positioning philosophy: Don’t rotate directly toward the next zone center. Instead, position on the edge of zone 2, perpendicular to the primary rotate path. This placement catches teams and offers escape routes if engagements turn bad.
Late-Game Positioning
Sunspot rarely hosts final circles, but teams rotating through it during endgame need positioning reads.
Storm reading: If zone 5+ is pushing toward Sunspot, avoid landing there. If zone 5+ is pushing away from Sunspot during early circles, treat the farm as a waypoint for gathering final rotations uncontested.
High ground domination: The warehouse elevation provides sight advantages. Teams rotating near Sunspot during late-game should use high ground to scope incoming squads. One sniper holding the warehouse roof can stall rotations.
Cover placement: Sunspot’s open design creates vulnerability in final circles. Teams forced into Sunspot endgame should immediately establish fortress positions using builds. The central farm structure offers vertical cover but limited horizontal spread: establish defensive perimeter before engaging.
Rotation prediction: In final zones, players passing near Sunspot should expect survivors to contest. Pre-position utility items (grenades, stink bombs) for area denial. Don’t assume Sunspot is empty: it’s a natural rotation waypoint for teams from the southwestern map.
Environmental Hazards and Features
Sunspot’s environment isn’t purely neutral. Specific mechanics and restrictions define how gameplay unfolds at this POI. Understanding these factors separates organized teams from disorganized ones.
Unique Mechanics at Sunspot
Sunspot features limited environmental hazards compared to volcanic or storm-heavy POIs. No lava, radiation, or electrified water threatens players. But, the open terrain itself acts as a hazard during storm rotations: players caught in the farm with no cover eat storm damage faster than in cluttered POIs.
The solar panel structures are climbable and destructible, offering both mobility and vulnerability. Teams can use panels as platform progression toward rooftops but expose themselves while climbing. Opponents can target climbers with ease, making passive advancement risky during contested loots.
Vehicle spawns introduce dynamic risk. While useful for rotations, enemies hear engines from hundreds of meters away. Using vehicles at Sunspot during early aggression broadcasts position to the lobby, so consider audio cost versus speed gain.
Building Restrictions and Safe Zones
Sunspot operates under standard building rules: no unique zones restrict structure placement. But, certain areas feature natural build-blocking geometry. The warehouse interior has tight corridors preventing full-sized 1×1 constructions. The farm’s open layout allows free building, but exposure increases during builds.
Safe looting zones (minimal visibility to external enemies):
- Inside warehouse storage rooms (enclosed on three sides)
- Behind storage containers on the eastern side
- Within the farm’s internal structures (requires navigating multiple stories)
High-risk zones (exposed during looting):
- Central farm rooftops (visible from 200+ meters)
- Open ground areas between structures
- Vehicles in the parking zone (stationary targets)
Teams should loot moving, not standing still. Three seconds of stationary looting visible to sniping squads equals guaranteed damage. Rotate while grabbing items, use nearby cover between each chest, and build minimal cover only if absolutely forced into extended looting sessions.
Best Loadouts for Sunspot Combat
Loadout selection varies by Sunspot’s game phase and expected engagement distance. Early-game fights at Sunspot occur in close quarters, favoring close-range weapons. Late-game scenarios demand flexibility for unknown engagement ranges. Smart players prepare loadouts before landing and adapt mid-fight when necessary.
Aggressive Loadout Options
Close-Range Domination (Early Game):
- Combat Shotgun (primary): Dominates farm structure corridors. One headshot eliminates unprepared targets. Always grab shotguns in Sunspot’s tight interior spaces.
- Assault Rifle (secondary): Medium-range follow-up if shotgun misses. Covers rotation escapes outside structures.
- SMG (utility): Shreds shields at point-blank range. Pairs with shotgun for devastating close-range duos.
- Healing items (2-3 slots): Sunspot fights burn shields fast. Bring shields and bandages.
This loadout excels when multiple teams land Sunspot. Quick kills and healing between fights maximize survival odds.
Mid-Range Aggressive (Rotation Fights):
- Assault Rifle (primary): Versatile weapon covering 20-60 meters. Dominating in open farm areas.
- Tactical Shotgun (secondary): Fallback for players closing distance.
- Sniper Rifle (utility): Optional. Overkill for Sunspot’s compressed distance but useful if sniping warehouse roofs.
- Healing items (2-3 slots): Same philosophy as close-range loadout.
Use this loadout for teams avoiding immediate aggression but prepared for mid-game duels. The AR dominance at medium ranges wins fights in the farm area without forcing close encounters.
Defensive and Utility Builds
Survival-Focused (Evading Third Parties):
- Assault Rifle (primary): All-purpose combat tool.
- SMG (secondary): Close-range burst if caught.
- Healing items (4+ slots): Prioritize healing over weapons. Sustain through rotations and third-party spam.
- Shield items (shields, potions): Stack protection.
Defensive squads trade loot ceiling for rotation security. This loadout works for teams playing passive, rotating early, and avoiding Sunspot’s main traffic. Less glamorous but wins through survival.
Utility-Heavy (Grenade Control):
- Assault Rifle (primary): Damage tool.
- Shotgun (secondary): Close defense.
- Grenades, Stink Bombs, or Shockwaves (2-3 slots): Crowd control and area denial.
- Healing items (2 slots).
Utility loadouts shine during contested Sunspot loots. Grenades punish grouped enemies, stink bombs deny warehouse cover, and shockwaves create escape routes. Teams should prioritize grenade spawns at Sunspot if adopting this approach.
Loadout Adaptation Example: Land at Sunspot expecting three squads. Grab shotgun and AR immediately. First fight rewards with kill = grab SMG from eliminated squad. Second fight nearby = maintain shotgun, AR, SMG loadout. Rotate away from Sunspot = drop SMG, grab healing items and AR for mid-game sustain. This flexibility separates good players from rigid ones.
Common Mistakes to Avoid at Sunspot
Sunspot’s forgiving loot makes it tempting for lazy gameplay. Experienced players exploit these habits. Understanding common errors prevents unnecessary eliminations.
Mistake 1: Looting Without Cover
Newcomers stand in open farm areas grabbing items while snipers line shots. Always loot behind structures, inside buildings, or while moving. Dead looting yields zero weapons.
Mistake 2: Ignoring Vehicle Audio
Driving a truck past enemies with audio on is an invitation. Either mute audio (not ideal) or accept that vehicles broadcast position. Use them strategically, not carelessly.
Mistake 3: Rotating Too Late
Waiting for storm to force movement guarantees sprint, storm damage, and reactive positioning. Smart rotations happen before zone 2 appears. Leave Sunspot proactively, not reactively.
Mistake 4: Overspreading Across POI
Squads splitting between farm, warehouse, and residential zones can’t support each other during contested fights. Sunspot is small enough to cover as a unit. Stay together until looting completes.
Mistake 5: Predictable Building Patterns
Stacking 1x1s in open areas makes players sitting ducks. Build with purpose: mobility, cover, or height advantage. Defensive builds should have multiple exits to escape third-party fire.
Mistake 6: Committing to Contested Chests
If two squads eye the same chest, sprinting to open it first usually ends poorly. Grab ground loot instead and contest from cover. A chest item isn’t worth 200 damage taken to acquire.
Mistake 7: Neglecting Storm Awareness
Sunspot’s southwestern position means zone 2 often pushes away. Assuming inward zone rotation causes late rotations. Constantly glance at map timer and zone preview. Adjust movement based on weather, not habit.
Mistake 8: Fighting in Sunspot During Crowded Games
If seven squads drop Sunspot, winning a fight doesn’t matter: sixth squads third-party immediately. Either commit to wiping the POI (unlikely) or rotate early even if under-looted. A suboptimal loadout beats an excellent loadout that’s being used by eliminated players.
Conclusion
Sunspot has earned its reputation as a reliable mid-tier POI that rewards well-informed choice-making without punishing casual drops. Mastering this location means understanding when to aggress early, how to rotate efficiently mid-game, and recognizing when to move through quickly toward better endgame zones.
The fundamentals remain consistent: land with purpose, loot with cover awareness, prioritize rotations over extended harvesting, and adapt loadouts based on encountered opposition. Players following these principles consistently leave Sunspot with viable weapons and positioning for mid-game fights, whereas those ignoring these lessons accumulate eliminations in the farm.
Sunspot won’t win every game single-handedly like Mega City or guaranteed endgame POIs might. Instead, it offers consistency and flexibility. Whether grinding ranked matches, warming up in pubs, or practicing fight mechanics, Sunspot delivers balanced environments for all skill tiers. The veterans at Yoomeegames recommend treating Sunspot as a trustworthy landing zone for repeatable success, not a destination expecting every match to end with a 5-kill bananza.
As Fortnite evolves through Chapter 6 and beyond, Sunspot’s core design remains strong. If the POI receives updates, the strategic principles outlined here adapt quickly: focus on positioning, cover, and rotations regardless of cosmetic changes. Drop Sunspot with confidence, and trust that understanding this POI translates into Victory Royales across the map.


